How to Fix the Pesky Keurig Coffee Maker: Add Water Light Stuck On
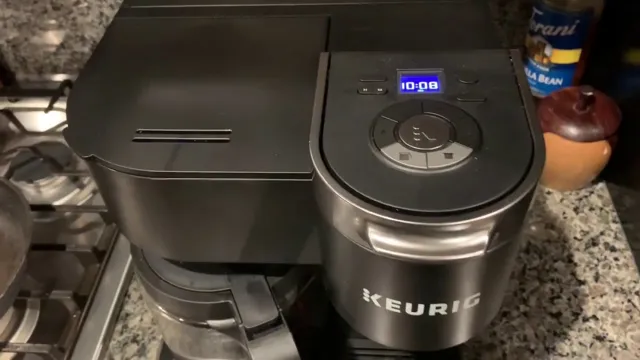
Are you frustrated with your Keurig coffee maker constantly displaying the “Add Water” light, even though your water tank is full? It’s a common problem that can be easily fixed with just a few simple troubleshooting steps. First, make sure that the water tank is securely in place and properly seated in the machine.
If it’s not, the machine won’t be able to detect that there’s water in the tank, and you’ll continue to get the “Add Water” light.
Next, try cleaning the machine’s water reservoir and needle. Over time, mineral buildup and debris can accumulate in the reservoir and on the needle, which can interfere with the machine’s ability to detect the water level. Simply remove the reservoir and the pod holder, and use a solution of equal parts white vinegar and water to clean the inside of the reservoir and the needle.
Rinse thoroughly and reassemble. If these steps don’t solve the issue, try resetting your Keurig. Unplug the machine and wait a few minutes before plugging it back in.
This can sometimes fix any software or electronic glitches that may be causing the problem. Hopefully, these troubleshooting steps will help you get back to enjoying your favorite Keurig brew without any interruptions from the “Add Water” light. Don’t give up on your machine just yet – a little maintenance and care can go a long way in keeping your Keurig running smoothly for years to come.
Understanding the Problem
Have you ever experienced the frustration of your Keurig coffee maker’s “add water” light staying on, even though you know the reservoir is full? This issue is surprisingly common, but fortunately, it’s usually an easy fix. The most likely culprit is a clog in the water line leading to the heating element. Sometimes mineral deposits or coffee grounds can build up and obstruct the flow of water, causing the machine to think it’s out of water and triggering the “add water” light.
To solve this problem, you can try descaling the machine by running a mixture of water and vinegar through it, or by using a commercial descaling solution. If that doesn’t work, you can also try cleaning out the water reservoir and water line with a brush or pipe cleaner. With a little bit of effort, you can get your Keurig back up and running and enjoy your morning coffee without any pesky warning lights!
What is the add water light? Why does it stay on?
The add water light on your coffee maker is a common feature that notifies you when the water level in the reservoir is low and needs to be refilled before making another batch of coffee. However, if you find that the add water light stays on even after you have refilled the reservoir, it could indicate a problem with the sensor or wiring. This issue can be frustrating, but the good news is that it is often fixable.
One solution could be to clean the sensor and make sure it is properly connected to the wiring. Another option is to replace the sensor altogether if it is defective. Regardless of the cause, it is crucial to address the problem promptly to ensure that your coffee maker functions correctly and extends the lifespan of the appliance.
Common reasons for add water light staying on
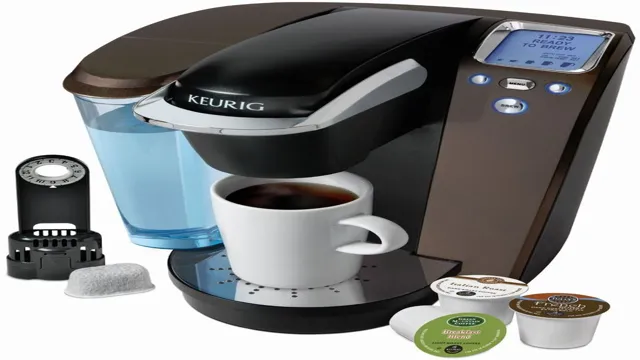
If you notice that the add water light on your appliance is staying on, there could be several reasons for this. One common cause is a faulty water level sensor, which may be misreading the actual water level and causing the light to stay on. Another possibility is that the appliance is experiencing a malfunction in the water delivery system, such as a clogged filter or a broken water valve.
It’s important to address this issue promptly, as running your appliance without enough water can damage internal components and lead to costly repairs. If you’re unsure of the cause of the add water light staying on, it’s always best to consult a qualified technician who can diagnose and repair the issue for you.
How to Diagnose the Issue
If you’re experiencing trouble with your Keurig coffee maker and notice that the add water light is staying on, you may be feeling frustrated and unsure of how to diagnose the problem. One possible culprit could be a clog in your machine’s water line, which can prevent the sensor from accurately detecting the water level. To check for a clog, start by ensuring that your Keurig is unplugged and all parts are removed.
Next, use a small pin or toothpick to gently clear any debris from the water line. Once you’ve completed this step, reassemble your Keurig and try brewing a cup of coffee to see if the issue is resolved. If not, you may need to investigate other potential causes, such as a faulty sensor or broken water reservoir.
Ultimately, troubleshooting the problem may require a bit of patience and persistence, but with some careful attention and problem-solving, you can get your Keurig back up and running in no time.
Checking water reservoir and positioning
When it comes to troubleshooting issues with your humidifier, one common problem is a low water level or a poorly positioned water reservoir. To start diagnosing this issue, first check the water level in the reservoir. If it’s low, simply refill it with distilled water, being careful not to overfill it.
However, if the water level appears to be consistently low, there could be a leak or blockage in the system that requires further investigation. In this case, it may be helpful to take apart the humidifier and inspect the interior components for any signs of damage or debris. Additionally, make sure that the water reservoir is properly positioned and securely fastened onto the base of the humidifier.
A loose or improperly positioned reservoir can cause water to leak out, leading to potential damage to the machine or surrounding surfaces. By regularly checking your humidifier’s water reservoir and ensuring it’s properly positioned, you’ll be able to prevent these issues and ensure your humidifier is running efficiently.
Cleaning the water reservoir and needles
When it comes to coffee machines, one of the most common issues users face is a dirty water reservoir or clogged needles. Not only can this affect the taste of your coffee, but it can also lead to malfunctions over time. If you notice your machine is not performing as it should, the first step is to diagnose whether the water reservoir or needles are the culprit.
To check for a dirty reservoir, start by removing it from the machine and emptying any remaining water. Next, give it a thorough rinse with warm, soapy water. Be sure to remove any debris or mineral buildup from the bottom of the reservoir as well.
If your machine has needles that insert into the reservoir, they may become clogged over time. To check for this, use a thin object such as a paper clip to gently clear any debris from the needles. Taking these simple steps to clean your coffee machine can help ensure it continues to brew the perfect cup every time.
Just be sure to follow your manufacturer’s recommendations for how often to clean and replace parts.
Inspecting electrical connections
When inspecting electrical connections, there are a few things to keep in mind. The first step is to shut off the power to the area you’ll be working in. Then, carefully look over each connection and check for any signs of wear, corrosion, or damage.
Loose connections can also cause issues, so be sure to tighten any screws or bolts that may need it. Additionally, it’s important to make sure the connections are properly insulated. If you notice any issues, it’s best to address them sooner rather than later to prevent any potential safety hazards.
By taking these steps, you can diagnose the issue and make any necessary repairs to keep your electrical system running smoothly. Remember, safety always comes first when dealing with electricity, so don’t be afraid to call in a professional if you’re unsure about anything.
How to Fix the Keurig Coffee Maker Add Water Light Stays On
If your Keurig coffee maker add water light stays on, there are several steps you can take to fix the problem. First, make sure that the water reservoir is properly seated in the machine and is filled with enough water. Sometimes, the add water light may come on if the reservoir is not properly aligned or if there isn’t enough water in the tank.
Another potential cause could be a clogged water line or needle, which can be easily cleaned by running a solution of vinegar and water through the machine. If none of these solutions work, try unplugging the machine and letting it sit for a few minutes before plugging it back in. This can sometimes reset the machine and fix any minor issues.
With a little troubleshooting, you can ensure that your Keurig is always ready to brew your morning cup of coffee.
Resetting the machine
Keurig coffee maker, add water light, stays on, resetting the machine. Are you struggling with the add water light staying on your Keurig coffee maker even though there is enough water in the reservoir? This can be frustrating, but the good news is that there is a quick and easy fix. Simply resetting the machine should do the trick.
Here’s how: turn the machine off and unplug it, then wait for about five minutes before plugging it back in and turning it on again. This should reset the system and hopefully solve the issue. If the problem persists, you may need to perform a deep cleaning or contact Keurig customer service for further assistance.
But for now, try resetting the machine and enjoy a delicious cup of coffee.
Replacing the water filter
If you’re an avid Keurig user, you may have encountered a common issue that prevents your coffee from brewing: the Add Water light stays on, even though the reservoir is full. Thankfully, fixing this issue is usually straightforward. Most often, the problem lies with the water filter.
Over time, the filter can become clogged with mineral deposits and sediment, leading to reduced water flow and inaccurate readings. To fix this, simply replace the water filter with a fresh one. To do so, first, unplug your Keurig from the electrical outlet.
Next, remove the old filter from the reservoir and dispose of it according to your local regulations. Then, rinse the reservoir with fresh water to remove any remaining debris. Insert the new filter into the designated slot and ensure it is securely in place.
Finally, fill the reservoir with clean water, plug your Keurig back in, and enjoy a delicious and hassle-free cup of coffee. So, if your Keurig Add Water light stays on, replacing the water filter could be the solution you need to get your coffee flowing again.
Repairing faulty electrical connections
If you’re experiencing the annoying issue of your Keurig coffee maker’s “add water” light staying on even when the water tank is full, don’t worry – there’s a simple solution. The problem is typically caused by faulty electrical connections within the machine. To resolve this, first, unplug your Keurig and remove the water reservoir.
Next, locate the machine’s little white check valve which can be found at the bottom of the chamber where you insert the water pod. Carefully remove the check valve using a paperclip or a needle, being gentle not to damage it. Clean it thoroughly using warm water and a gentle scrub, then put it back in place.
Reconnect the water reservoir and plug the machine in again. This should correct the faulty electrical connection and solve the issue of the “add water” light staying on. Remember, safety comes first and it’s essential to always unplug the coffee maker before attempting to repair it.
Preventing the Problem
If your Keurig coffee maker’s “add water” light stays on even when the reservoir is full, it’s likely due to an issue with the sensor. But don’t fret, there are some preventative measures you can take to avoid such situations. Firstly, always make sure to use filtered water instead of tap water to avoid buildup of minerals and other contaminants that may affect the sensor.
Another way to prevent the sensor from malfunctioning is to regularly clean your Keurig. Be sure to descale it every three to six months using vinegar or a descaling solution. This will remove any mineral buildup that may have accumulated over time.
Finally, avoid overfilling the reservoir beyond its capacity. This excess water can cause the sensor to malfunction and trigger the “add water” light to remain on even with a full reservoir. By following these simple tips, you can prevent the “add water” light from staying on and ensure that your Keurig is always ready to brew a fresh cup of your favorite coffee.
Regular cleaning and maintenance tips
Maintaining a clean and well-functioning home is a top priority for most homeowners, but it can be easy to overlook the importance of preventative measures. By taking simple steps to prevent dirt, grime, and other debris from building up in your home, you can save yourself plenty of time and hassle down the line. One of the best tips for preventing these problems is to regularly clean and maintain your home’s appliances and systems.
This can include everything from your HVAC system to your kitchen appliances, and it should be done on a regular schedule to ensure that everything is in good working order. By taking the time to regularly clean and maintain your home, you can help prevent a wide range of issues from ever arising, from clogs and leaks to damaged appliances and more. So don’t neglect your regular maintenance tasks – they’re essential for keeping your home in top shape.
Replacing parts before they fail
Preventing the Problem: Replacing Parts Before They Fail We’ve all been there – a sudden breakdown of a vital component that halts a project or leaves us stranded on the side of the road. It’s frustrating, time-consuming, and often expensive to repair. However, this could be easily avoided by proactively replacing parts before they fail.
Regular preventive maintenance can prevent equipment or vehicle breakdowns, which can save you time and money in the long run. It’s like changing the oil in your car – you do it consistently to ensure the engine runs smoothly, rather than wait for it to fail and face a more significant problem. Moreover, by managing the equipment’s lifecycle, you can predict when specific parts could be expected to fail and replace them beforehand.
Proactive replacement not only reduces downtime but also improves productivity, which can save you money and ensure your equipment’s longevity. So, if you want to avoid unexpected setbacks, keep your equipment running smoothly, and save money, consider preventive maintenance and proactive replacement of parts.
Conclusion: Enjoy your Keurig Coffee without Interruption
In short, it seems that the Keurig coffee maker’s “add water” light has a stubborn personality, determined to stay on until its thirst is quenched. Despite its persistence, with a simple refill of the water tank, this little light will finally be satisfied and allow the brewing process to commence once again. So go ahead and give your Keurig the hydration it craves and enjoy a piping hot cup of joe!”
FAQs
Why is the add water light on my Keurig coffee maker staying on?
The add water light may be staying on if the reservoir is not properly seated on the base of the coffee maker or if it is not filled to the minimum fill line. Make sure the reservoir is flush against the base and filled to the appropriate level.
Can I still make coffee if the add water light is on?
No, the Keurig coffee maker will not allow you to brew coffee if the add water light is on. It is important to fill the reservoir to the appropriate level to ensure proper operation of the coffee maker.
How often should I refill the water reservoir on my Keurig coffee maker?
The frequency of refilling the reservoir depends on your usage. It is recommended to refill the reservoir before each use to ensure an optimal brewing experience.
What should I do if the add water light continues to stay on even after filling the reservoir?
If the add water light continues to stay on, make sure the reservoir is properly seated on the base and filled to the appropriate level. If the issue persists, try cleaning any built-up debris or mineral deposits from the water reservoir or contact Keurig customer service for further assistance.


