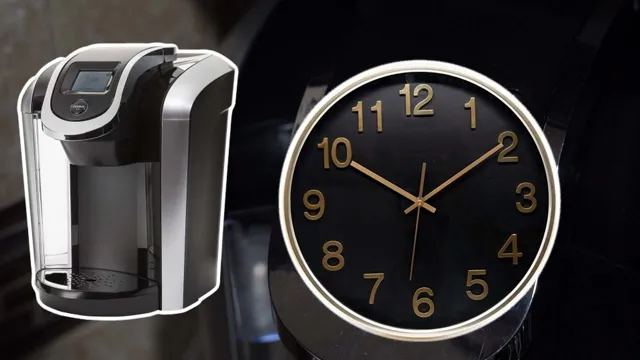
A Step-by-Step Guide to Set Clock on Keurig K-Elite and Duo
Keurig k-Elite is a fantastic coffee maker that simplifies our mornings and elevates the coffee drinking experience. From its sleek design to the variety of features, it’s a perfect investment for coffee enthusiasts. However, setting the clock on your Keurig k-Elite may seem complicated at first.
But don’t worry, we’ve got you covered, and we’ll guide you through the entire process step-by-step! In this blog, we’ll discuss how to set the clock on your Keurig k-Elite and make your mornings even more effortless. So, grab your favorite mug, and let’s get started!
Step 1: Power On Your Keurig k-Elite
If you’ve just purchased a Keurig k-Elite, setting up the clock is the first step towards enjoying delicious cups of coffee. To get started, you need to power on your Keurig k-Elite. Look for the ‘power’ button on the machine and press it.
Once the machine is on, you’ll see the buttons light up, indicating that it’s ready to go. However, before you jump into making your first cup of coffee, you need to set the clock. Using the arrows on the machine, you can adjust the time to reflect your current time zone.
Press the ‘set’ button to lock in the time, and voila! Your Keurig k-Elite is now ready to use, with the correct time displayed on the machine. Setting up the clock is an essential step when it comes to getting your Keurig k-Elite up and running, and it ensures that all your coffee brewing activities go smoothly.
Press the Power Button on the Keurig k-Elite.
If you’re looking to brew a great cup of coffee, the Keurig k-Elite is a top contender. Start by pressing the power button on the machine to turn it on and allow it to begin heating up. The k-Elite has a sleek design and is easy to operate, so you will be ready to start brewing in no time.
This step is crucial, as it heats up the water to the optimal brewing temperature, ensuring that your coffee is brewed to perfection. Once the machine is turned on, you can select the cup size and strength of your coffee to suit your preferences. With a wide range of options available, you can tailor your brew to your exact liking.
So, press that power button and get ready to enjoy a delicious cup of coffee from your Keurig k-Elite!

Step 2: Access the Menu
Once you’ve plugged in your Keurig K-Elite, it’s time to access the menu so you can set the clock. Thankfully, this is a simple process that shouldn’t take more than a minute or two. First, locate the “menu” button on the control panel.
It’s usually located near the top or on the side and is labeled as such. Once you’ve found it, press it and the menu will appear on the screen. From here, you can use the arrows to navigate through the various menu options.
Keep in mind that different models may have slightly different menus, but setting the clock should be an option on all of them. Look for an option labeled “set clock” or something similar. Once you find it, select it, and proceed to set the time using the arrow buttons.
Once the correct time is displayed, press the menu button again to exit the menu and save the changes. That’s it! You’ve successfully set the clock on your Keurig K-Elite.
Press the Menu Button on the Keurig k-Elite.
Now that you’ve turned on your Keurig k-Elite, it’s time to access the menu. This might seem intimidating at first, but don’t worry – it’s actually quite simple. Press the “menu” button on the keypad, which is located just under the screen.
If you’re using the machine for the first time, you’ll be prompted with initial settings such as language preference, time, and date. Once you’re past that, you’ll find a variety of options such as brewing size, strength control, and temperature preferences. You can adjust these settings to your liking, allowing you to have the perfect cup of coffee every time.
It is important to note that the menu options may vary based on the model of Keurig you have. Experiment with the different settings and find what works best for you. Happy brewing!
Step 3: Set the Time
If you’re wondering how to set the clock on your Keurig K-Elite, it’s actually quite simple! The K-Elite model has a feature that allows you to set the time manually. To begin the process, locate the “Menu” button on the control panel and press it. Scroll through the options using the arrows and select “Set Clock.
“Once you’ve selected this option, use the arrows to adjust the hour and minute until the time is set correctly. Don’t forget to select “AM” or “PM” for the correct time of day. Once you’re satisfied with the time, press the “Menu” button again to exit the clock setting mode.
It’s important to note that the time on your Keurig K-Elite may sometimes reset due to power outages or after unplugging the machine. If this happens, simply repeat the steps to set the clock again and you’ll be good to go!
Press the Clock Button on the Keurig k-Elite.
After setting the date on your Keurig k-Elite, it’s time to set the clock. This way, you can make sure your coffee maker is up-to-date and provides you with the perfect cup of coffee every time you use it. To set the time, you need to press the clock button on your Keurig k-Elite.
Once you press it, you will see the clock display appear, and it will start flashing, indicating that you can now set the time. Use the up and down arrows to adjust the hours and minutes, and make sure to select AM or PM. Once you’ve set the correct time, simply press the clock button again, and the clock display will stop flashing, indicating that your Keurig k-Elite is now set to the correct time.
This step is essential to ensure the appliance’s functionality as it relies heavily on date and time settings. So remember to set the clock on your Keurig k-Elite to ensure a perfect brew every time you make coffee.
Use the Hour and Minute Buttons to Set the Time.
Setting the time on your electronic device might seem daunting at first, but it’s actually quite easy. In step 3, you need to use the hour and minute buttons to set the time. These buttons are usually labeled with a “+” and “-” sign, or they might be in the form of a circular directional pad.
Start by pressing the hour button until you reach the correct hour, taking note of whether it’s morning or evening. Next, use the minute button to set the minutes to the correct time. It’s important to ensure that the time is accurate to avoid any confusion or missed appointments.
Once you’ve set the time correctly, double-check it before proceeding. And that’s it! Setting the time is a simple process that shouldn’t take too much of your time.
Press the Menu Button to Save your Time Settings.
When it comes to setting the time on your device, it can sometimes be a bit confusing or tedious. Luckily, there’s a simple trick that can save you a lot of time and frustration. Once you’ve accessed the time settings menu, all you need to do is press the menu button to save your changes and return to the previous screen.
This may seem like a small detail, but it can make a big difference if you’re setting the time on multiple devices or need to make frequent adjustments. So the next time you’re adjusting the time on your device, remember to press that menu button and save yourself some precious minutes. It’s a small action that can save big in the long run.
Step 4: Verify Time is Set
Now that you’ve gone through all the steps, it’s important to verify that your Keurig K-Elite’s clock is set correctly. Simply press the “Menu” button on your machine and use the up and down arrows to highlight the “Time” option. Then, press “Select” to confirm.
You should see the current time displayed on the screen. If the time is incorrect, you can use the same arrows to adjust the hours and minutes until it’s accurate. Make sure to pay close attention to AM and PM formats as well.
Once you’re satisfied with the time, press “Select” again to confirm the changes. Congratulations, your Keurig K-Elite’s clock is now set and ready to use!
Check the Time Displayed on the Keurig k-Elite.
Keurig K-Elite. Step 4 of using your Keurig k-Elite brewer is to verify that the time is set correctly. To do this, simply look at the time display on the machine.
If the time is incorrect, you can easily adjust it by pressing the “Menu” button and using the arrow buttons to navigate to the “Clock” option. Once there, use the arrow buttons to set the correct hour and minute. Be sure to choose the correct AM or PM setting as well.
Once the time is set correctly, press the “Menu” button again to confirm. It’s important to ensure that the time on your Keurig k-Elite is set correctly, as it will be used to schedule your brewer’s auto-brew feature if you choose to use it. The Keurig k-Elite is a fantastic brewer that offers many features to make your coffee brewing experience quick and easy, so be sure to take advantage of all of them!
Step 5: Enjoy Your Coffee with Perfectly Set Time!
Looking for a way to set the clock on your Keurig K-Elite? With a few simple steps, you can easily set the time and have a perfectly brewed cup of coffee waiting for you in the morning! To begin, make sure your Keurig is plugged in and turned on. Next, press the “Menu” button on the main screen. Use the arrows to navigate to the “Clock” option, then press “OK”.
Use the arrows again to select the correct time of day, making sure to specify AM or PM. Finally, press “OK” to set the time. And that’s it! Your Keurig K-Elite is now ready for use and will brew coffee at the perfect time every time.
Thanks to this simple time-saving feature, you can enjoy your morning coffee without any fuss or hassle. So go ahead, set that clock and enjoy your perfectly brewed cup of joe!
Conclusion
Congratulations! You’ve successfully set the clock on your Keurig K-Elite. Now you can brew your morning coffee with just the right amount of style and punctuality. Show off your impressive clock-setting skills to your friends and family and bask in the glory of having the perfect cup of coffee at the perfect time. Cheers to a well-timed and perfectly executed Keurig experience!”
FAQs
How do I set the clock on my Keurig K-Elite?
To set the clock on your Keurig K-Elite, first turn on the machine and wait for it to heat up. Then, press the “Menu” button on the LCD screen. Use the arrows to navigate to “Settings” and press “Menu” again. Finally, use the arrows to select “Time” and use the hour and minute buttons to set the appropriate time.
Why isn’t the clock on my Keurig K-Elite displaying the correct time?
If your Keurig K-Elite clock isn’t displaying the correct time, try resetting it by unplugging the machine and plugging it back in. If that doesn’t work, make sure that you have set the correct time zone in the machine’s settings.
Can I use the Keurig K-Elite without setting the clock?
Yes, you can still use the Keurig K-Elite to make coffee without setting the clock. However, the clock is useful for setting a delayed brew time or for indicating when it’s time to descale the machine.
How do I change the time on my Keurig K-Elite for daylight savings?
To change the time on your Keurig K-Elite for daylight savings, navigate to the “Settings” menu using the “Menu” button on the LCD screen. Then, select “Time” and use the hour and minute buttons to adjust the time accordingly. Make sure to also update the time zone if necessary.